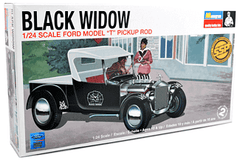
 You want to build a model car and its your first time. The box art makes these kits look as cool as can be, but what's involved in building the kit? This guide will walk you through the process.
The model kit we will be working with is Revell's "Black Widow" Ford Model T Pickup Hotrod. This is a skill level 2 model kit, which typically indicates there will be no need for extensive cutting or sanding, and painting is optional. Before you start it is always a good idea to look through the instruction manual first.

 This kit contains 4 sprue trees holding 48 different parts. Different types of parts are often categorized by the sprue tree they are on.
The parts of your model can sometimes have a slight film from the manufacturing process which should be cleaned off. Submerge the entire sprue tree in warm soapy water. Rinse and let the parts air dry. Clean parts ensure that glue, paint and decals adhere properly.

These model kits look great even without paint, but if you decide to paint your kit you can really improve its looks with a little detail work. Many parts can be painted while they are still attached to the sprue tree. This makes it easier to handle and position the part while painting. Choose the right sized brush for the part. For smaller parts you should use a fine or extra fine brush, larger parts can be painted with larger brushes. Dip just the tip of your brush into the paint. If you dip the brush too deep there will be too much paint for the part and things will get messy. If you are unhappy with the results, you can always us some thinner and a rag to clean it all off and start over. Thinner should also be used to clean your brush.

The parts are attached to the sprue trees and must be cut away. Usually a clean knife stroke or scissor cut will detach the part without taking a hunk of material with it. Using proper tools make this job much easier. A hobby knife or sprue cutter is recommended, we will be using a Testors hobby knife. These tools are very sharp so care should be taken when cutting. You should always cut on a surface that can get damaged as the knife will likely cut into it. Poster board or an old magazine work well. Cutting mats are also available and worth the investment.

Read through the instructions before assembling any parts. You will be guided step by step through the assembly. Notes on the correct paint colors are also provided in the instructions. To ensure a proper fit, use a hobby knife to trim any excess plastic from parts before assembling. Carefully apply a small glue trail to each part to be joined. Be careful not to apply too much glue, think of a hamburger with too much ketchup, it oozes out all over the bun. It is also a good idea to assemble small fragile parts like antennas and mirrors last. This helps minimize breaking things off when handling the model. Gluing is a skill that takes some time to master, so take your time here and remember to take brakes if your feeling frustrated.

Applying decals makes the model come to life and is my favorite part of the build. Our kit comes with water slide decals. The graphic design slides off the paper backing when soaked in water. Soak the decal for about 15 seconds, and then to place the decal, hold it up where it goes and slide it off the paper and onto the model. If the decal needs repositioning, then wet your fingers with water and move the decal into position. There may be some residue from the glue, use a wet q-tip or damp cloth to clean it off being careful not to wipe the decal away. Allow the decal to fully dry before handling.
by Randy Wakefield


